


Space in a greenhouse is often at a premium. Traditionally, seed starting requires room on tables for multiple containers, heat mats, etc. So, when I found out that my colleague, Seattle garden journalist and speaker, Erica Browne Grivas was working with a new space-saving method, I was interested.
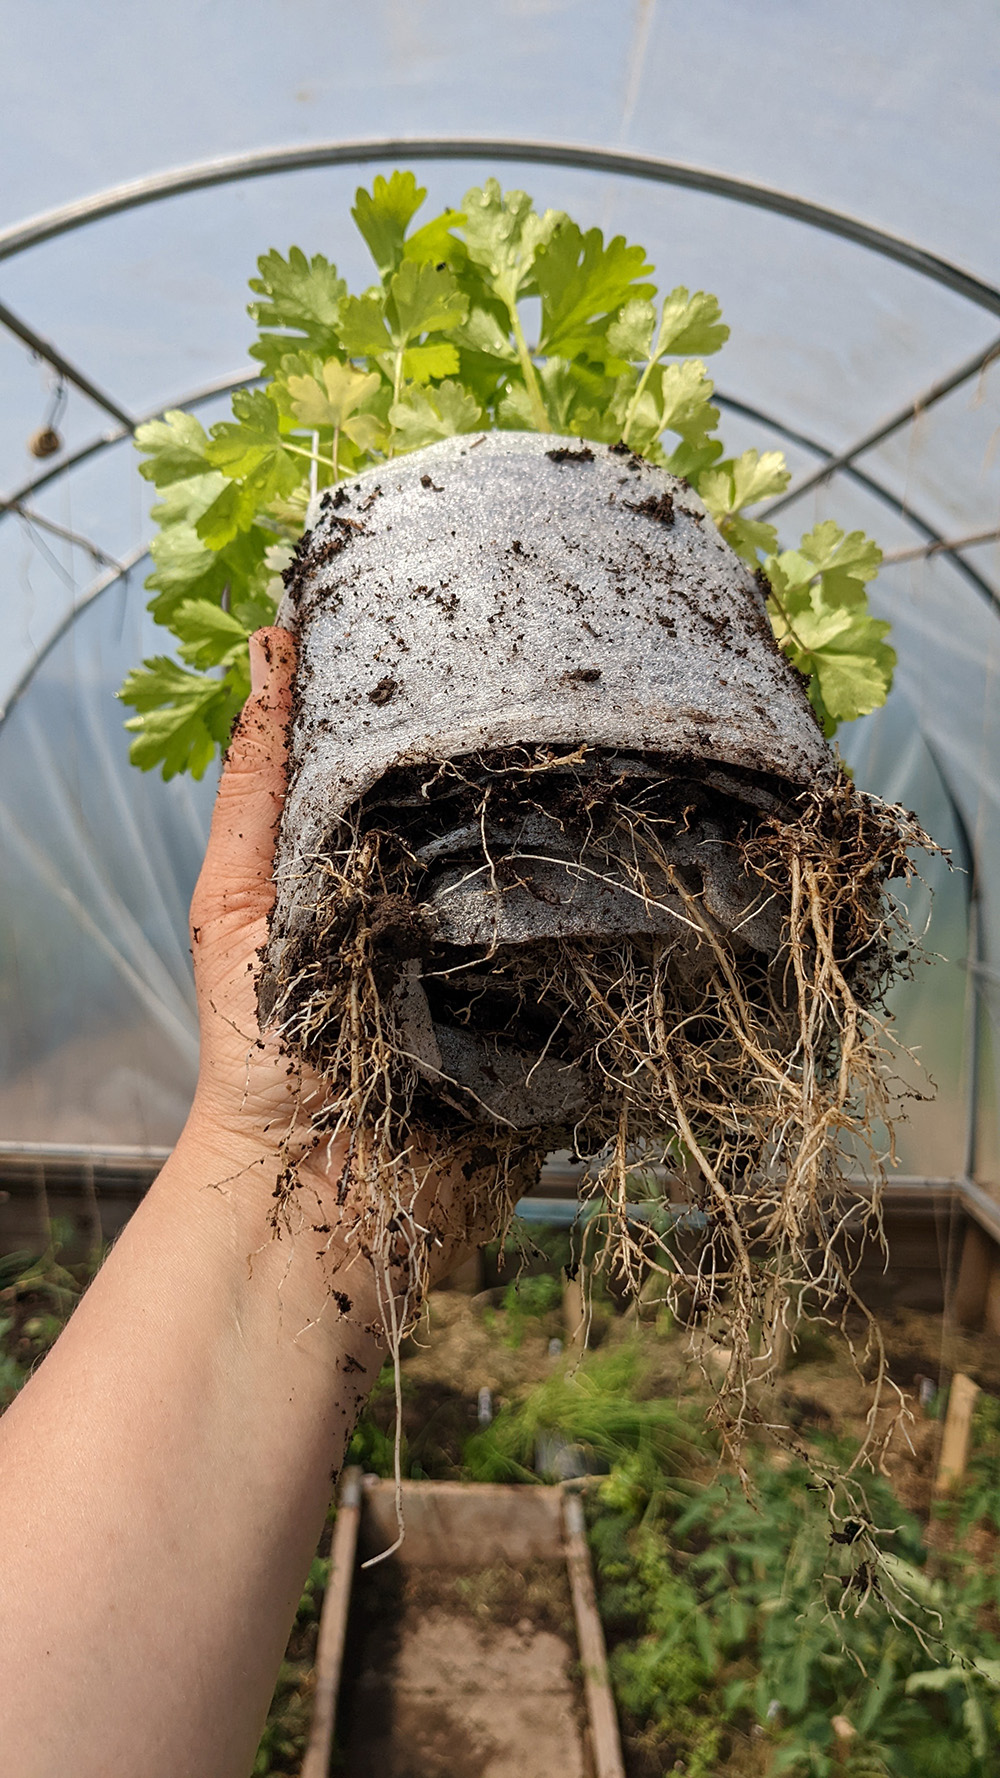
Basically, it involves creating long rolls of potting mix held by flexible wraps. It’s rolled the way a baker would roll up dough for any number of delicious pastries—think cinnamon or jelly rolls. Looking down on the roll from the end, the circling layers of potting mix resemble a snail shell—hence, seed snails—a term popularized by UK home gardener Farida Sober on Instagram last year. With the seed snails planted from the top and stored upright in containers, many seeds can be started in just a few rolls. When the plants have developed, the seed snails can be unrolled for transplanting in the garden, or, more potting mix may be added to the flattened snail, then re-rolled back up again to grow on for longer.
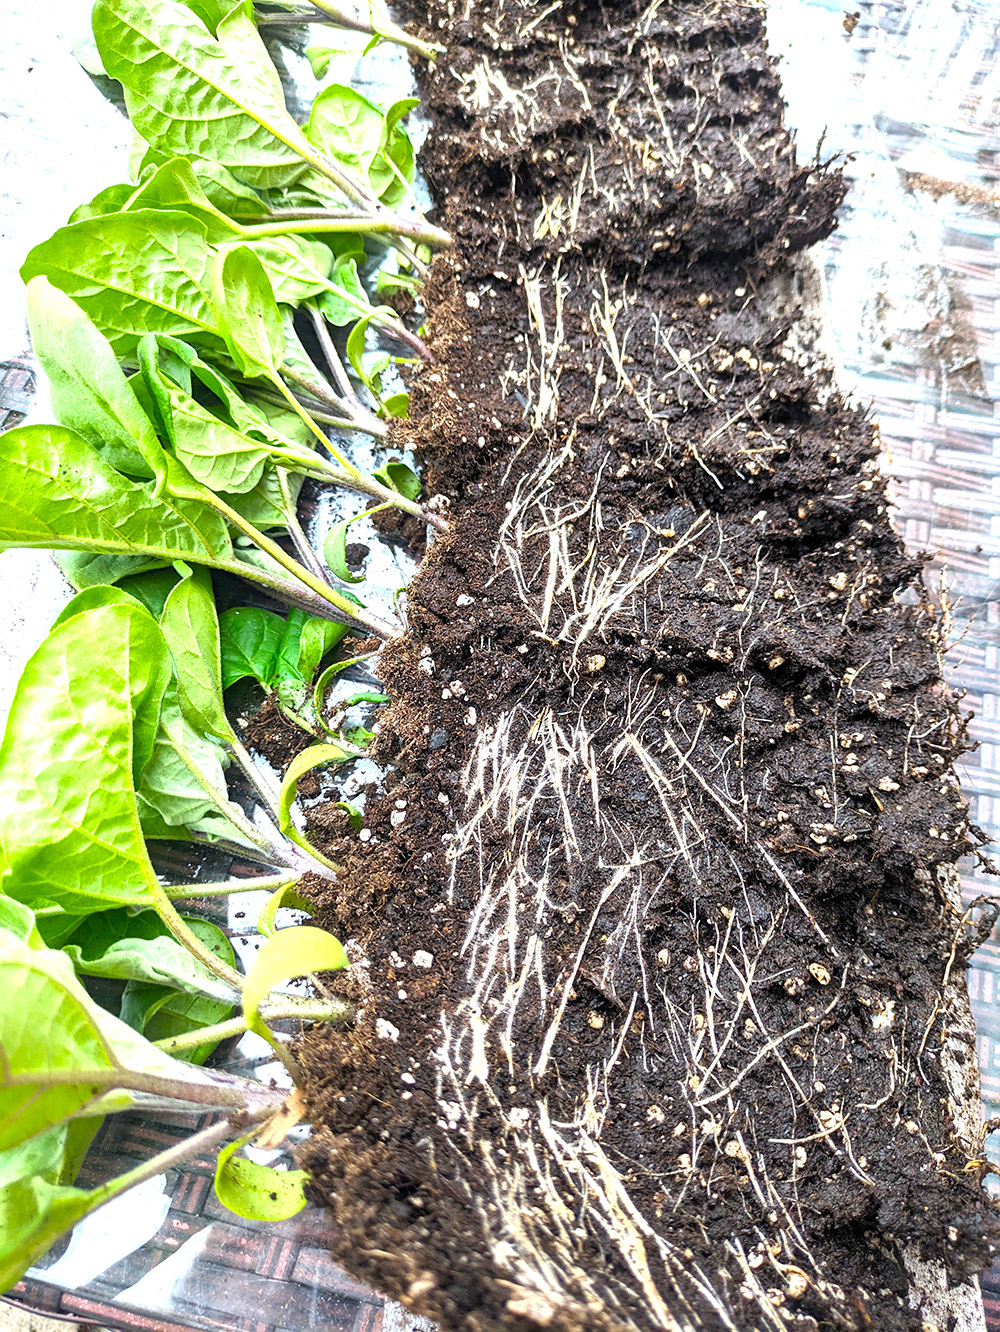
Erica appreciates the results on Farida’s Instagram posts. She says, “When I saw the five-inch roots on the seedlings, my jaw dropped to the floor.” She also likes that she could reuse things from around the house, and that the seed snails require less watering. But most of all, Erica says, “I just love that it helps you get the seedlings through their most vulnerable time.”
Here’s a seed snail recipe…
Materials
For the wrapper, anything flexible, such as bubble wrap, plastic packing materials, corrugated cardboard, newspapers, or burlap; Waterproof tape such as electrical or duct; Ordinary potting mis—not seed starting mix; Seeds of your choice.
- Cut the roll material into a rectangle, approximately seven inches long by fourteen inches wide.
- Spread and press down moistened potting mix a few inches deep on the rectangle, keeping one end open without mix for a few inches.
- Start rolling firmly from the other end.
- Secure the roll with tape in several places.
- Stand upright in a container. Several rolls can usually fit in a bucket.
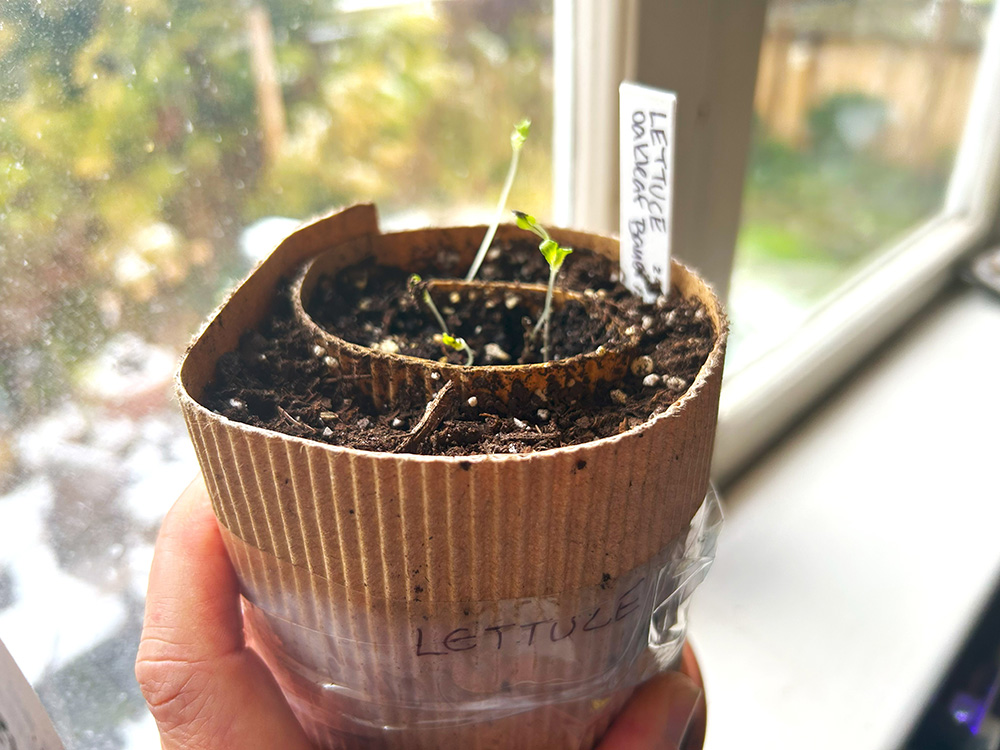
- Place seeds in the circles created by the snail according to the seed packet directions.
- Water gently from the top until the plants emerge. Then switch to watering from the bottom. Water when soil mix is drier on top.
- After seedlings are well established, unroll and tease apart the roots for planting out. It’s best to handle by the leaves or roots, not fragile stems.
Tips
Experiment. Erica says, “See what works.” She has tried various wrappers for the rolls, including cardboard, “I notice it dries out quicker than plastic.”
Size the rolls to the seeds. With plants like lettuce, Erica notes, “The snail rolls don’t need to be the full seven inches long, because the roots are shorter.” However, the roots of plants such as leeks or eggplants will occupy the full space
No potting up, just re-roll. If growth slows dramatically, or plants start to have yellowing leaves, or if the weather’s not warm enough to send them outside, clip the tape and unroll on a flat surface. Add another layer of potting mix right over the developing roots. Then re-roll and tape again. Remember that couple of inches left clear on the wrapper end? That will accommodate the extra mix when the roll becomes fatter.