


There is an easier middle way between the effort of traditional composting and the specialised requirements of a wormery: invite the worms into your regular bin, and let them do the work.
Of all the ongoing experiments and trials in my garden, the longest-running, most revealing and ultimately most fruitful are those around compost-making. I’m talking about starting from scratch, with raw, garden- and household-found and nature-gifted materials, and turning them into dark, crumbly, soil-building compost.
Reams have been written and sermons spouted about making compost, much of it useful advice. But, as with much of life, we’ve tended to box off compost-making into neat, black or white, separate compartments – hot or cold, fast or slow – and we’re obsessed by minutiae, such as whether our compost bin is big or insulated enough, or if our heap is getting hot enough to sear every last chickweed seed. Have we got the right mixture of ingredients? Do we need a wormery or a compost bin? Should we choose a simple lidded ‘Dalek’ or a geared-up tumbling type? Does spending more mean better results? Will composting tempt a ‘night of the rats’?
One of gardening’s most fundamental joys – turning stuff we don’t want into stuff we do – is so over-egged that making modest mounds of compost can appear daunting (let’s blame mystical ‘expert’ advice and needless novelties). A gardening lifetime has taught me this: the simplest, most effective and lowest-input ways of doing things are usually found in the grey cracks between our neat obsessions. That’s why I want to get you dabbling in something that is straightforward, is low on effort but high on results, will help you cheat on your wheelie bin, and is utterly compulsive. It involves a lot of squirming and churning, a bit of sieving, and buckets of satisfaction. Welcome to the wonders of ‘wormposting’.

This is an approach that thrives in the ‘grey zone’ between a traditional wormery, where fast-moving red and stripy compost worms inhabit a self-contained unit that’s remote from the soil, and more general garden compost-making. Wormeries work well for situations where there’s no garden, such as on a balcony, or in urban plots dominated by hard surfacing. They often need fine-tuning to get going, and the worms, which eat their way through kitchen scraps, are totally reliant on us to feed them. In return, they produce dark, crumbly worm- or ‘vermicompost’, a rich, growth-boosting natural fertiliser. But let them starve, dry out, drown, or freeze solid, and they’re quickly kaput. Some wormeries also come with a hefty price tag (DIY versions are easy enough).
I’ve always struggled to see the point of wormeries in gardens where there’s access to open soil. Yes, they’ll munch on cooked food scraps (including meat and fish), which are best kept out of compost bins and heaps, but most gardeners I know rarely discard food (and veggie diets slash non-compostable waste to near zero). But meld the compost worms’ astonishing waste-conversion abilities with some composting basics – by wormposting – and what you get is something remarkable that’s also altogether heftier than just worm or garden compost alone. What’s needed to make this miracle mix is modest: a compost bin, some worms, and something for them – and the legions of microscopic decomposers that work alongside them – to eat.
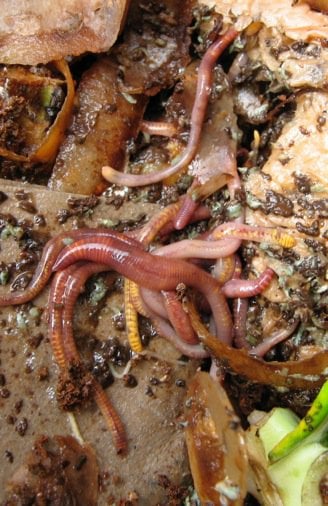
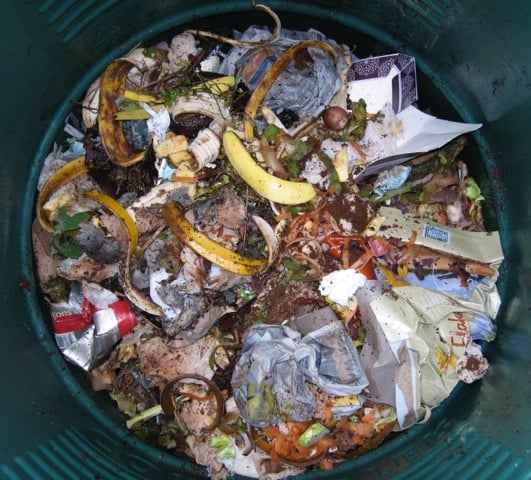
My own set-up is simple: I have three Dalek-type, lidded, recycled plastic compost bins, all sitting on the soil. To set an empty bin going (spring’s a good time to start, practically and emotionally), I drop in a roughly equal 50:50 mix of ‘greens’ (banana skins, sappy weeds, lawn mowings) and ‘browns’ (scrunched cereal packets, chopped stems, shredded damp cardboard) from both indoors and the garden, until a layer at least 15cm (6in) deep has amassed, and it turns mouldy. I then add a margarine-tubful of thrashing tiger (or brandling) worms (not their languid, earth-inhabiting cousins), which you can find in manure heaps, the bin of a compostophile neighbour, or a tackle shop (they’ll eventually find your bin under their own steam, but I like to kickstart things). A few weeks on, they’ll be tucking into the decaying feast at the bottom of the bin. To deter rat-infested nightmares, sit your bin on a sheet of fine-gauge galvanised mesh.
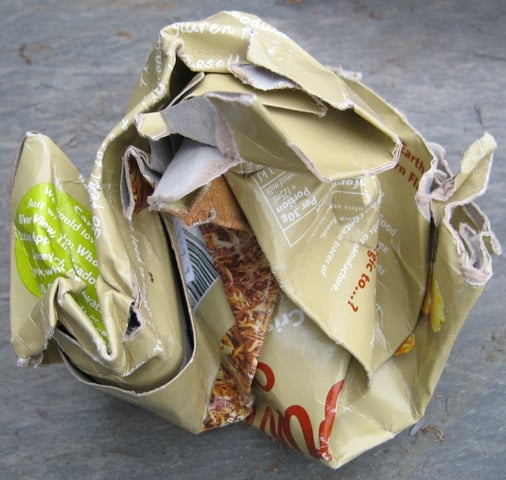
Scrunching paper or cardboard food packaging into a ball is crucial – this holds its shape in the bin’s mix, keeping it aerated and creating nooks where your worms will live and multiply. Check it’s not coated in thin plastic film, or you’ll be fishing out ghost-like skins when sieving time comes round; paper cups leave a similar persistent skin. The ‘windows’ on most paper envelopes won’t rot, and you need to avoid anything with a shiny foil element. Watch out for those sticky labels on apples and other fruits, or your beds will be peppered with annoying plastic confetti.
From then on the going is easy. Just keep adding your 50:50 mix on a regular basis, until the bin is full. This can take a while, because the contents sink as you go – it once took me over three years to fill a single bin. Once you reach the top of the bin, kickstart a new one. The level of your wormpost will fall rapidly during the warmer seasons, and slow in winter, only stopping if the contents of the bin freeze solid, when the worms will retreat into the soil.
After a few months, a dense, dark brown layer of wormpost begins to accumulate at the bottom of the bin, deepening with time. The mix needs to stay moist but not get sodden; if it becomes dry, leave the bin lid off on a drizzly night (listen carefully then, and you’ll hear the worms at work). Adding a monthly handful of leafmould keeps the bin charged up with microscopic decomposers. You never have to turn the bin’s contents – the worms do the heavy mixing. The rotting here is cool and slow.
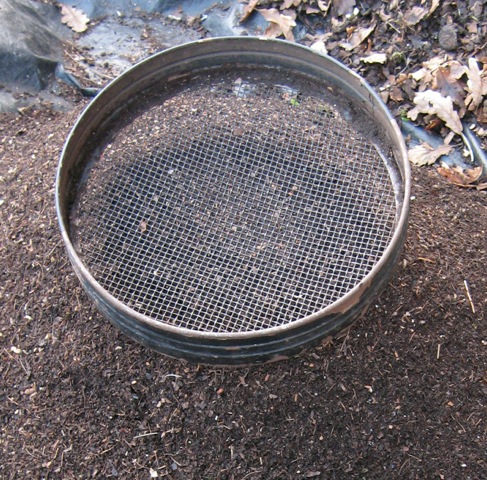
Once a bin is full, I cap it off with some sappy weeds or leafmould, put the lid back on, and let it be for up to 18 months. The level keeps falling gradually as the worms work their way through the mix; when there’s nothing left to eat, they exit through the base of the bin. When you can scoop up a brown, friable, sweet-smelling handful, and there’s no sign of any workers, wiggle the bin free of its contents and grab a sieve.
Diligently excluding films, foils and labels ensures wormpost that’s free of most alien oddments, but ‘improved’ packaging will always catch you out. Sieving breaks up lumps and flushes out rogue confetti. I use a fine sieve for wormpost destined for my own peat-free potting mix, a coarser one if I’m planning to use it to feed the soil (two handfuls per square metre/yard). It’s stored under cover in old compost bags, and it keeps indefinitely.
The best of two worlds, it’s effortless, free and local, and constantly renewing. Go on, let your worms loose and let the wonder begin.
Text and images © John Walker
Find John on Twitter @earthFgardener