


It’s the season when our gardens are overflowing with flowers. So, I asked garden writer and photographer Janet Davis to share her delightful tips for creating wearable floral art. And with a greenhouse, you don’t even have to wait for the bountiful season. You could get this look year-round. Here’s how she does it.
Materials:
- Flowers and foliage
- Broad-brimmed hat
- Four-foot long flexible woody stem—grape, dogwood, bittersweet, honeysuckle, etc.
- Thin floral wire
- Florist’s green tape
- Sharp clippers/scissors
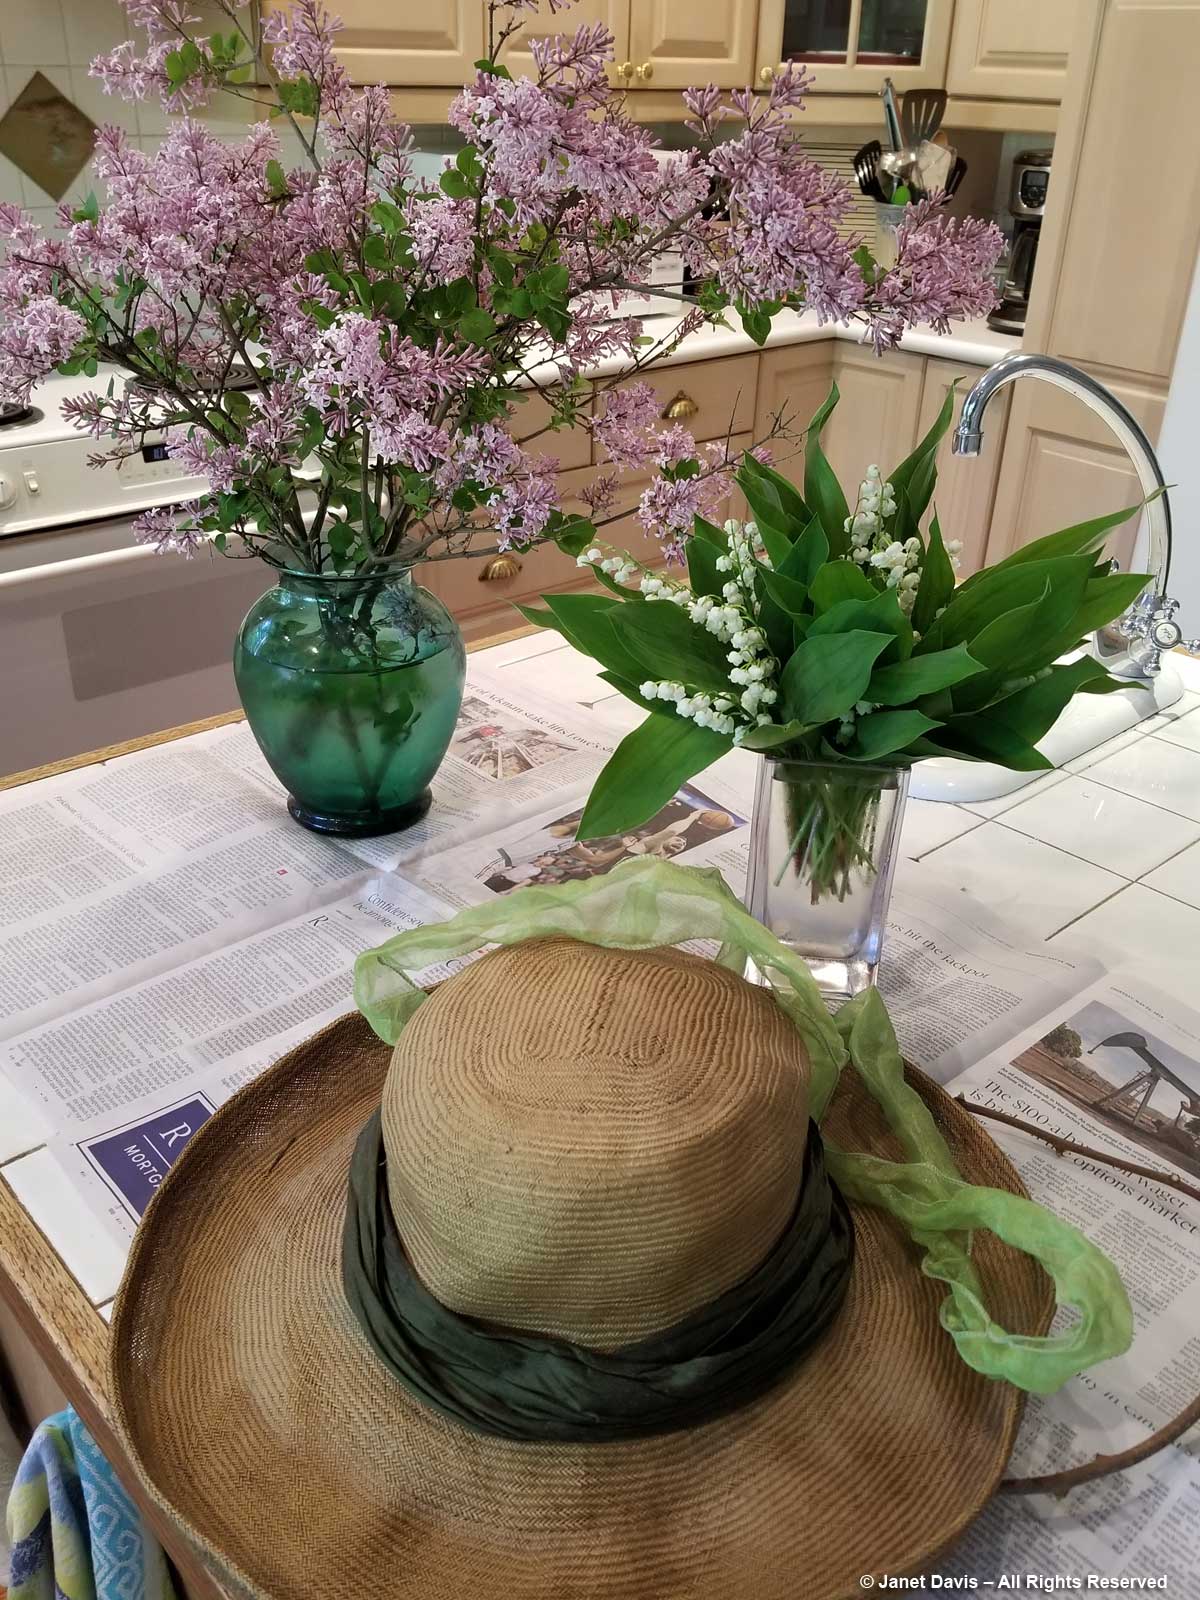
Step 1. Harvest and condition. Gather blooms you know will be long-lasting stalwarts. Sweet scent is a bonus. For Janet right now, this means lilacs and lilies of the valley—which she dubs, “guerillas of the valley,” because of their fiercely spreading habit. Janet recommends conditioning your choices for longer life. Group the flowers by kinds in water-filled containers. Place the blossoms overnight in a cool space, such as a dark garage. In Janet’s case, she uses a beer fridge.
Step 2. Choose a hat. Whatever you’ve got will work, but Janet favors those with wide brims, so the flowers have a place to rest.
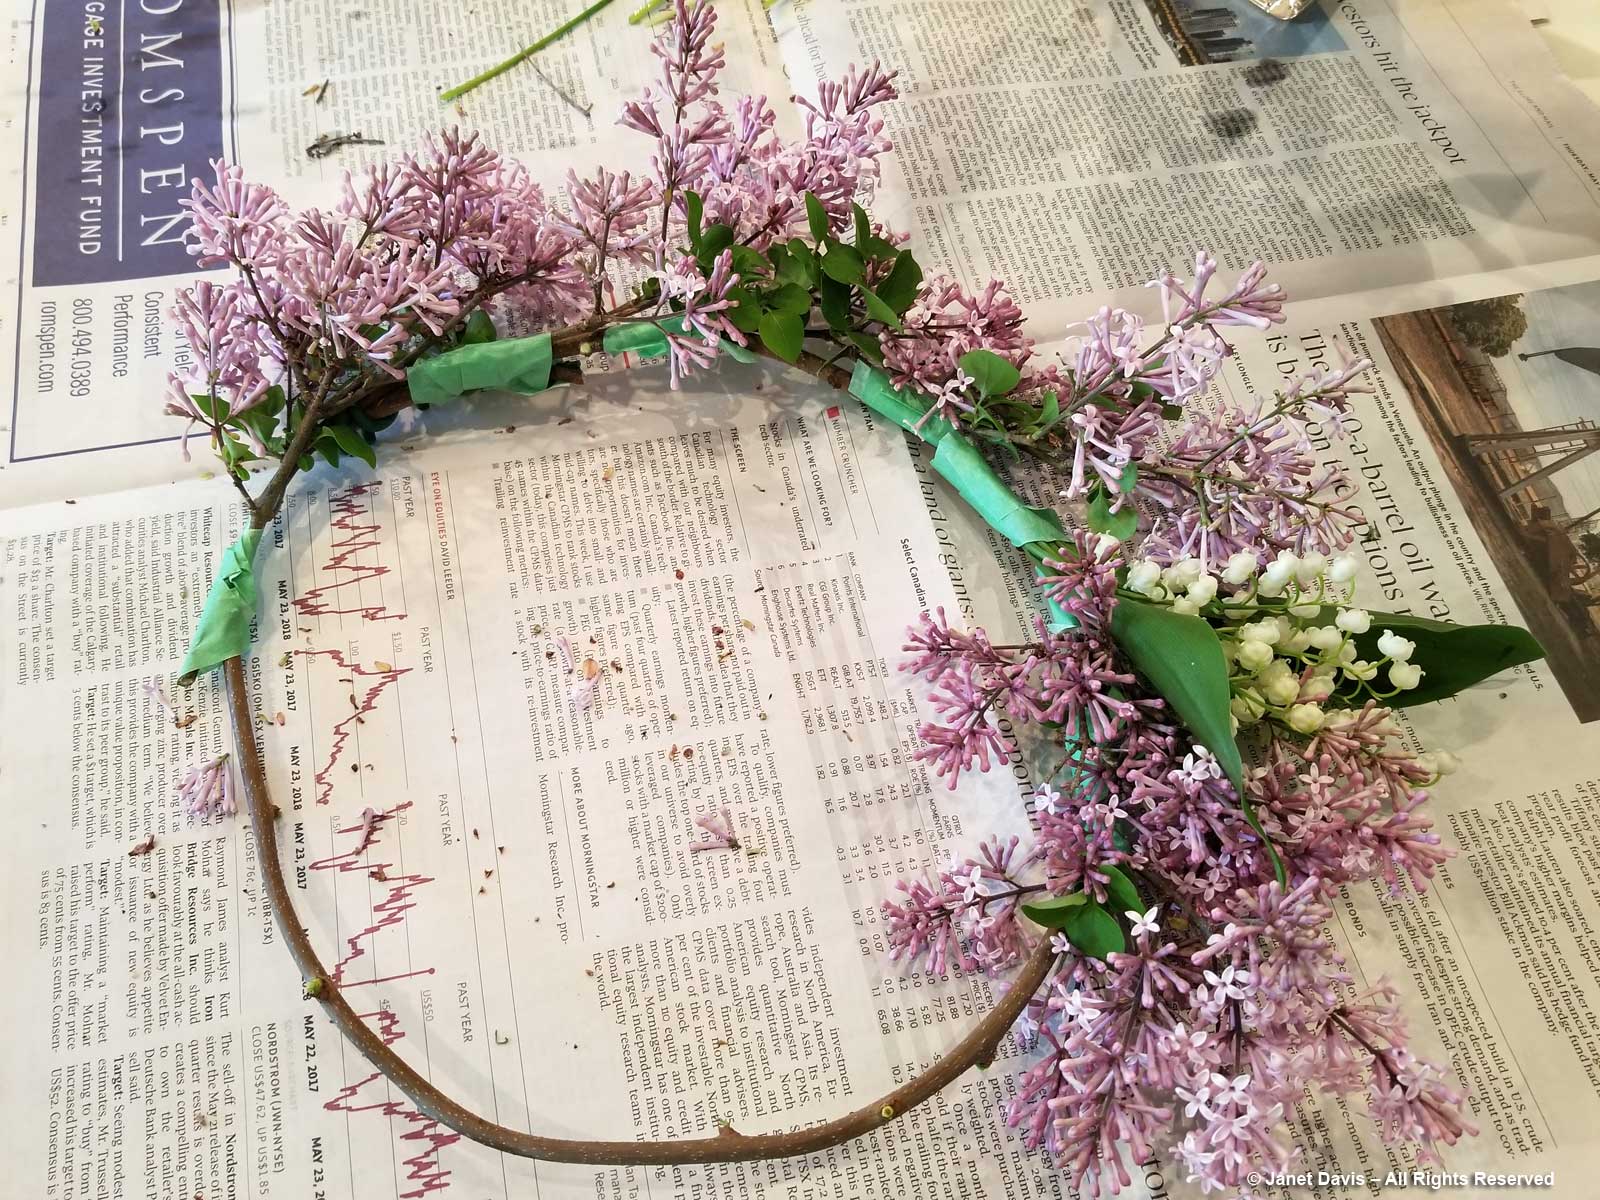
Step 3. Make a hat band. Loop the pliable woody stem twice around and fit to the hat. Remove the circled stems from hat. Bind the circlet together with floral wire. Cut off any excess stem.
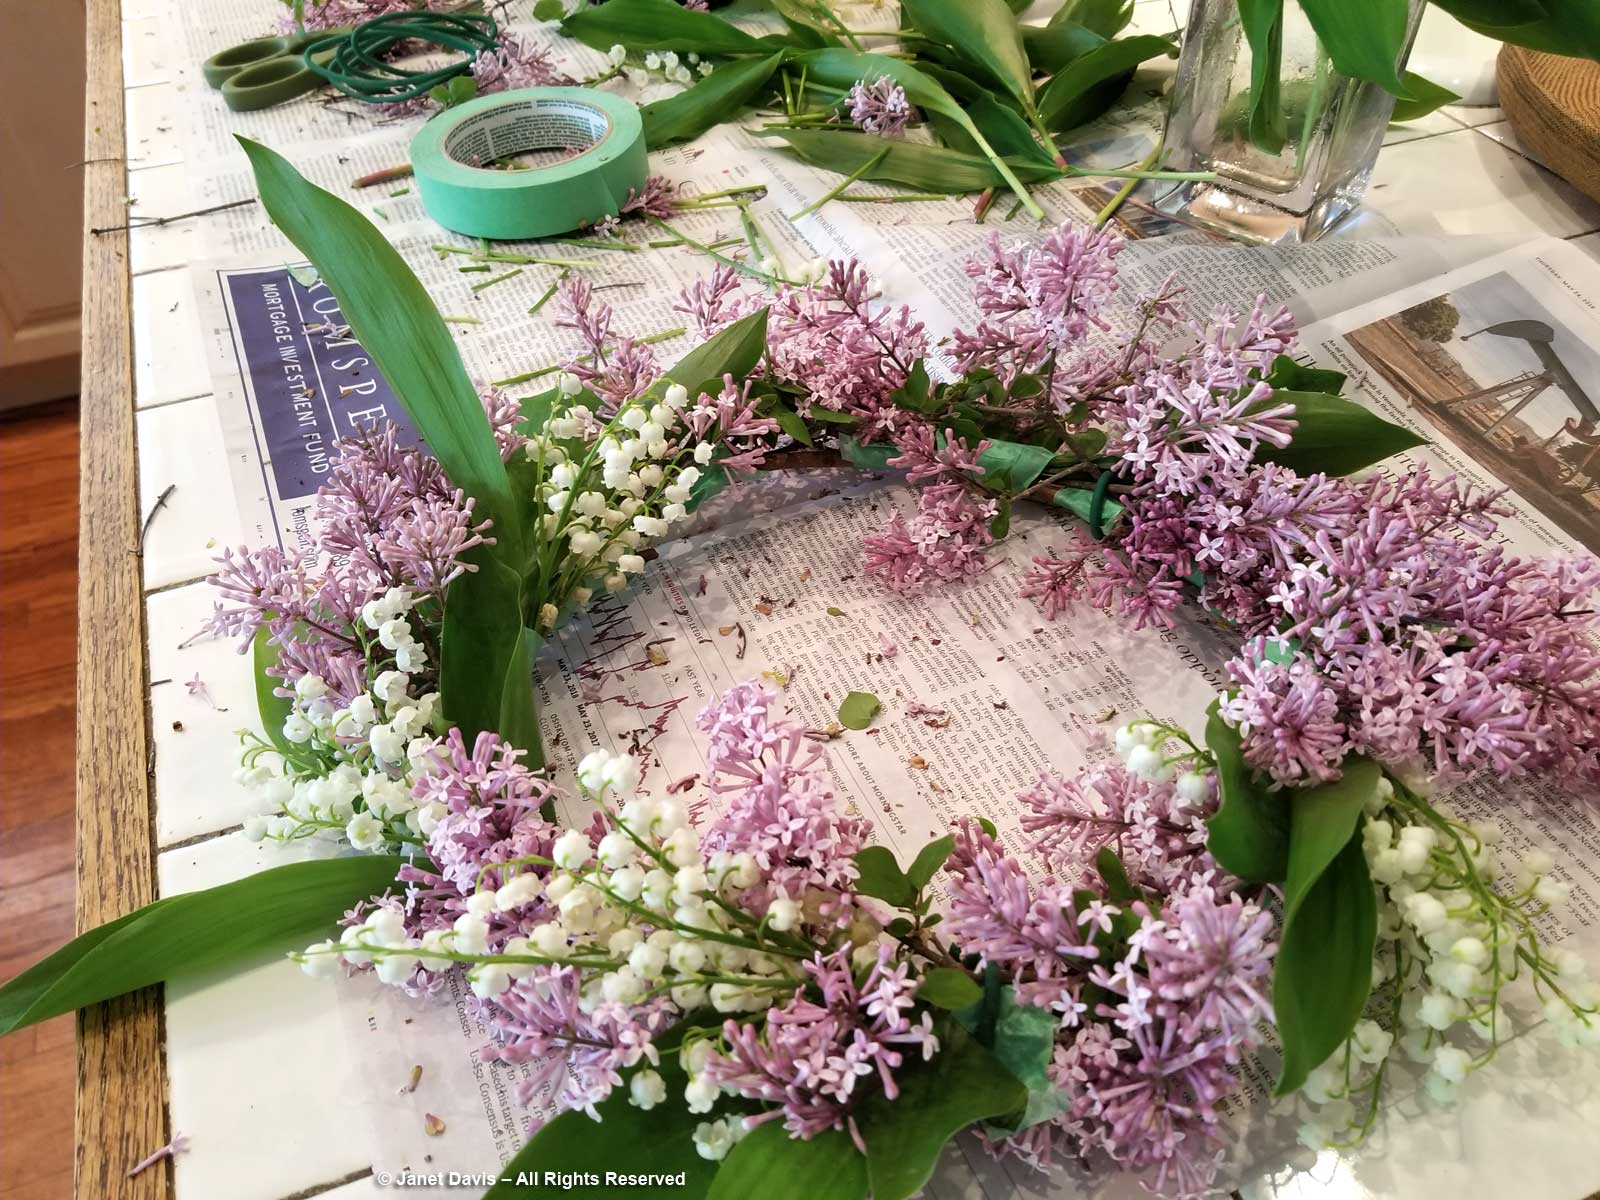
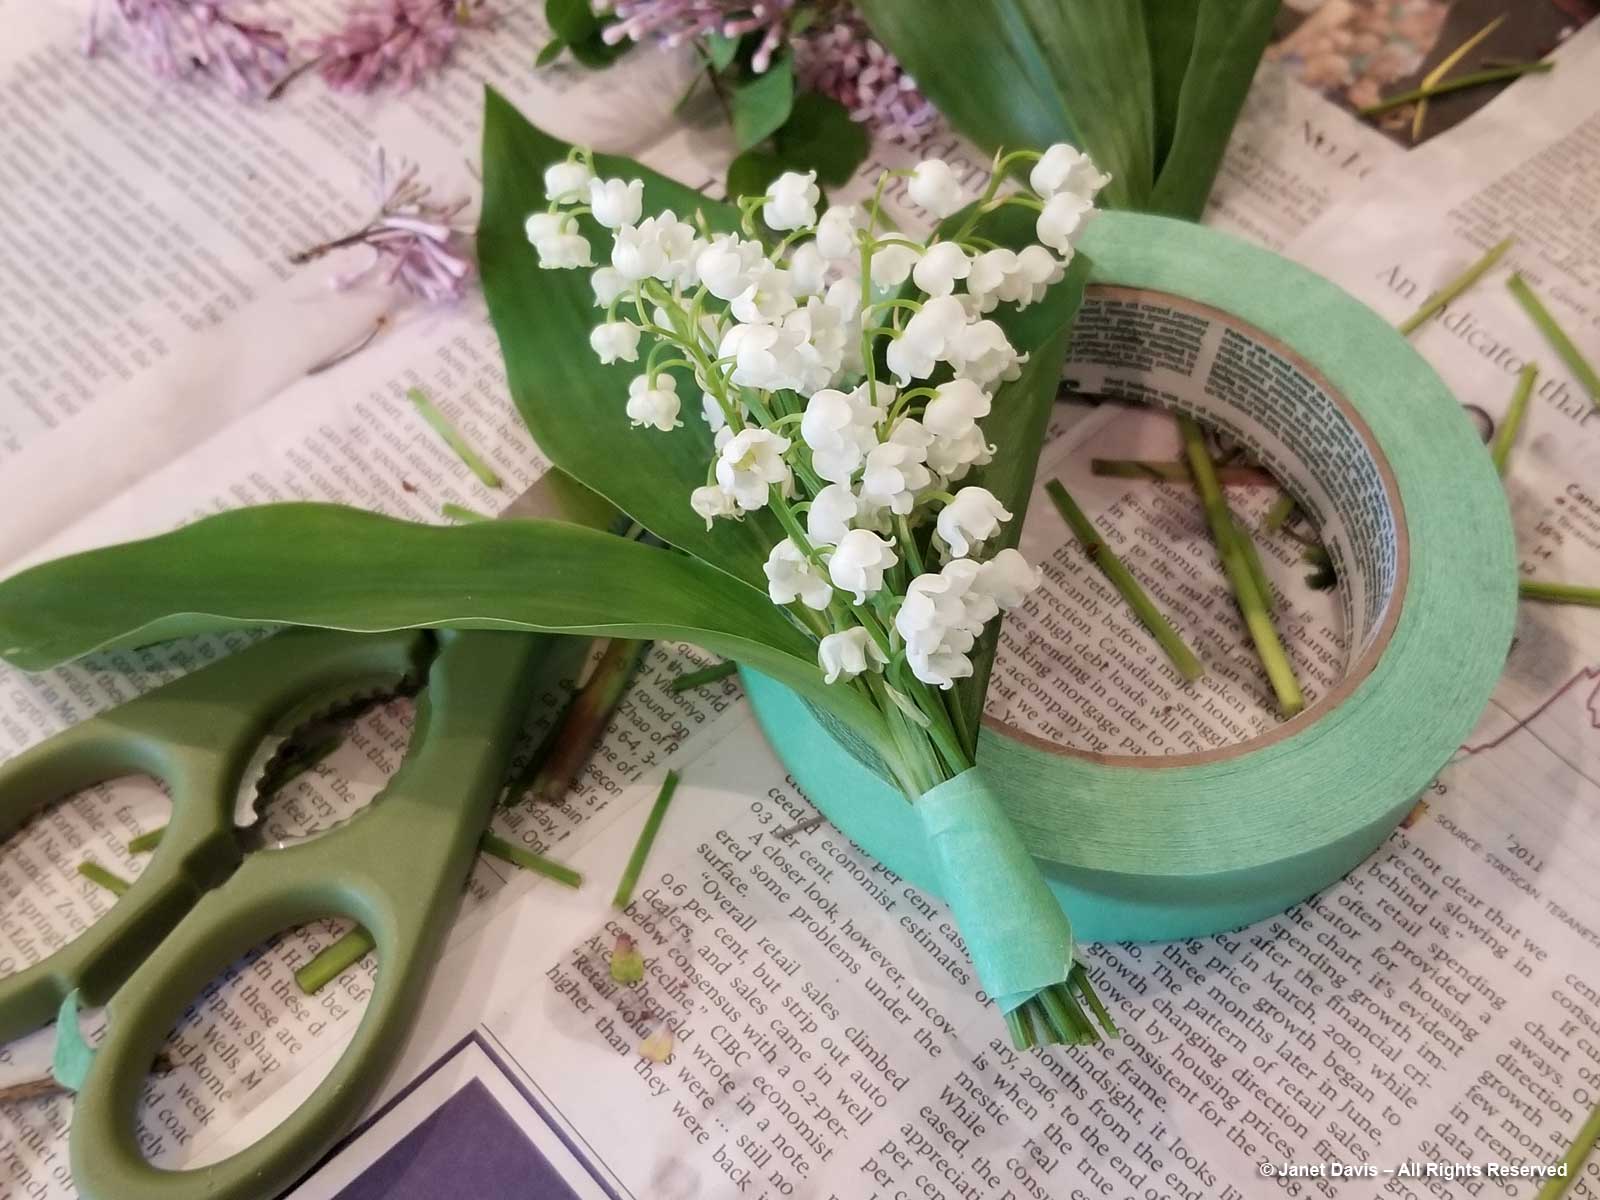
Step 4. Create 6-inch bouquets. Trim flowers and foliage and combine into small bunches, wrapping the stems together with the floral tape. The number of bouquets will depend on the size of your blooms. You need enough to fill in around the brim.
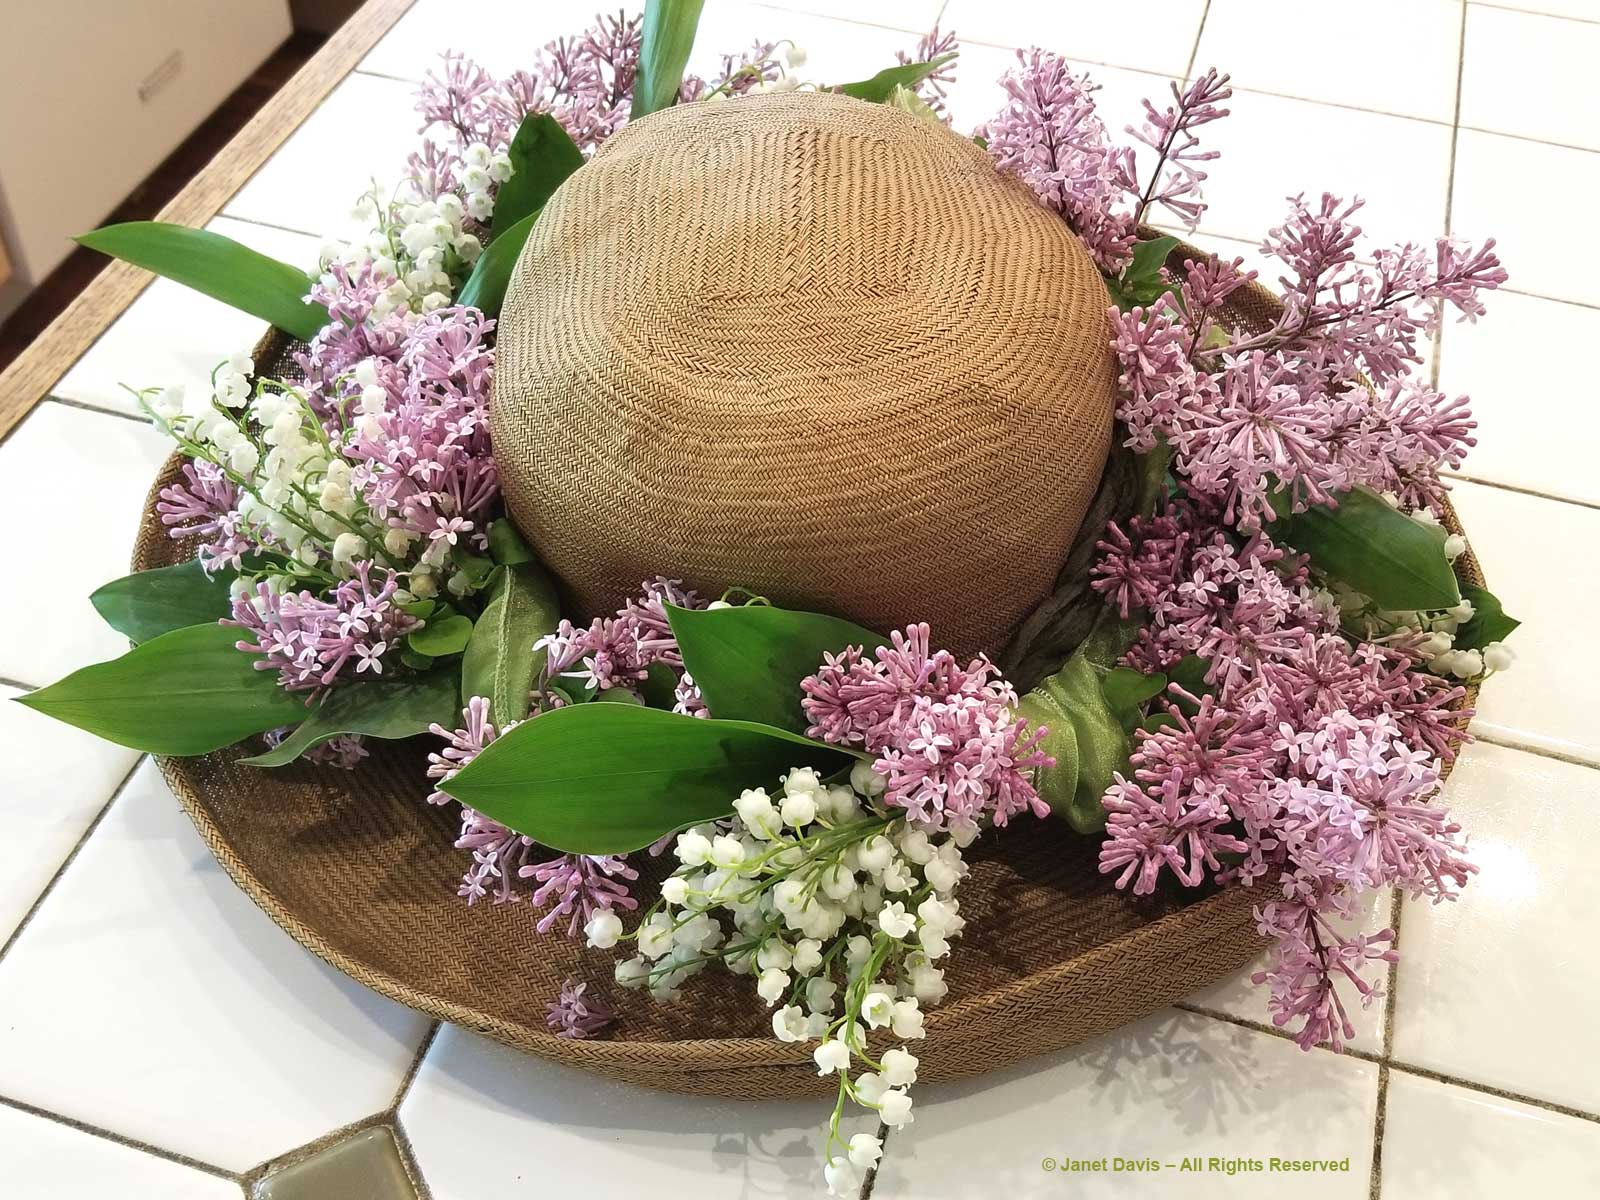
Step 5. Attach bouquets to the hatband. Using the floral tape, secure each flower bunch to the stem circlet. Work so the next bouquet overlaps and hides the ends of the last. Place the circlet back on the hat. Enjoy.
Please note: Janet recommends substitutions. For instance, any thin wire will do. In these photos, she’s using painter’s tape instead of floral. Her advice? Improvise with what you’ve got. Don’t let the lack of materials keep you from the fun of a flowery hat.
To see other sweetly perfumed creations and a lot more, you can visit Janet’s website.